The Animegao Kigurumi universe is one of the most fascinating and technically demanding niches in cosplay. Unlike conventional masks, the kigurumi mask seeks the aesthetic perfection of an articulated doll or 2D character, translating this "doll-style mask" into the three-dimensional plane. This guide is your gateway to mastering the fit, maintenance, and performance with this iconic accessory.
Visual reading of the character
The essence of a Kigurumi-style cosplay mask lies in the suspension of disbelief. The goal is not to look like a person wearing a mask, but rather an entity that has jumped straight off the screen. The silhouette is characterized by exaggerated features: large eyes, flawlessly smooth skin (usually resin or silicone), and a static expression that requires the cosplayer to compensate with ultra-expressive body language.
The color palette must be treated with surgical precision. The transition between the mask and the zentai (the full-body suit) must be invisible. If the skin color of the mask does not match the fabric of the neck or hands exactly, the illusion is instantly broken. Always observe the resin's shine; in flash photography, a mask that is too shiny may look too plastic, while one that is too matte loses its "doll" charm.
Priority pieces for success
For your Animegao Kigurumi to work, you must prioritize three fundamental elements:
- Internal Stability: A mask that wobbles on your head destroys the illusion. The internal fit must be firm but comfortable, using memory foam or high-density EVA.
- Visibility: The field of view is extremely limited in full-head masks. The position of the vision holes (usually located in the iris of the mask's eyes) must be perfectly aligned with your eyes.
- Gestures (Acting Cosplay): Since the mask has no moving expressions, you must learn to "act with your head." Slight tilts, slow movements, and calculated pauses are what give the character "life."
Practical adaptation for use
Transforming a display piece into something wearable requires mask customization. The inside of the mask should be lined with fabrics that absorb sweat and prevent the resin from coming into direct contact with the skin, which can cause irritation or slippage during use.
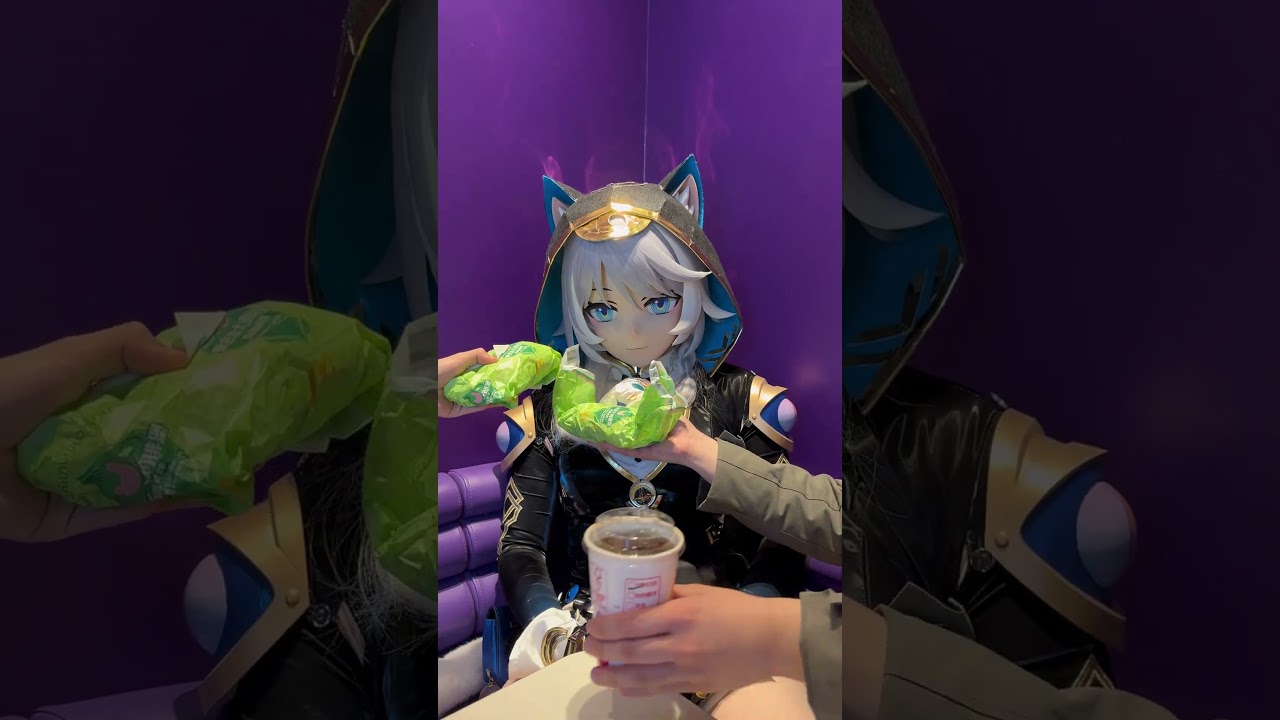
As seen in the example above, the adaptation must provide for basic needs, such as hydration or movement at events. The use of a thin balaclava under the mask is mandatory for hygiene and to prevent hair from interfering with vision.
Common Errors and Solutions
| Error | Solution |
| :--- | :--- |
| Mask "wobbling" on the head | Add high-density foam blocks to the temples and nape. |
| "Robot neck" effect | Use a turtleneck or a scarf that covers the junction between the mask and the suit. |
| Blurred vision/sweat | Apply anti-fog spray to the inner lenses and use an internal fan (micro cooler). |
Estimated Budget
| Item | Price range | Source |
| --- | --- | --- |
| High-density foam (for padding/filling) | $4.00 - $10.00 | Estimated FX |
| Disinfectant spray for upholstery/fabrics | $5.00 - $9.00 | Estimated FX |
| Contact cement or silicone adhesive | $3.00 - $6.00 | Estimated FX |
| Wig cleaning kit (neutral shampoo and conditioner) | $6.00 - $14.00 | Estimated FX |
Estimated conversion based on a reference FX rate; local retail prices may differ.
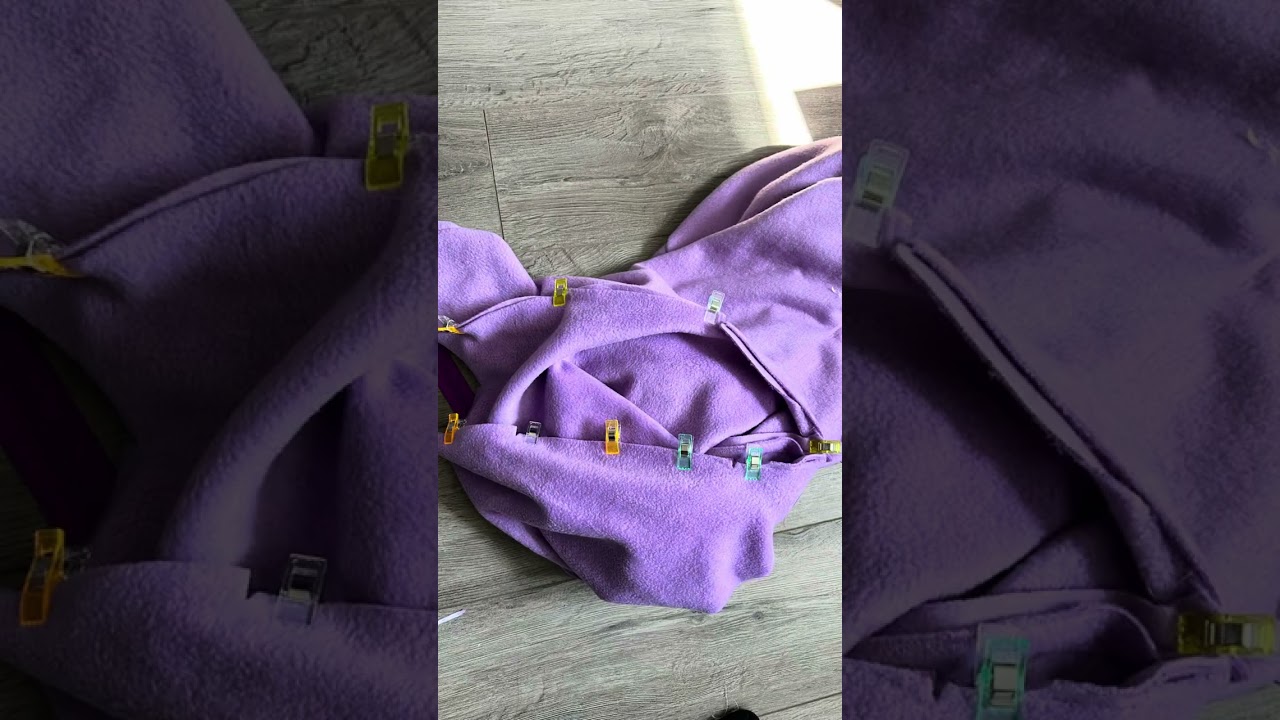
Execution strategy: Step by step
Step by step
- Measurement and marking: Put on the mask and ask for help to mark, with masking tape, where your eyes are in relation to the mask's iris.
- Foam cutting: Cut out foam blocks 2cm to 5cm thick. Test the fit on the forehead and sides. The mask should turn along with your neck.
- Technical gluing: Use contact cement or silicone adhesive to fix the foam to the inside of the resin. Checkpoint: The mask must be firm enough not to move out of place when shaking your head slightly.
- Kigurumi hygiene: After use, spray disinfectant inside (avoiding the lenses). Let it dry in a ventilated place, away from direct sunlight, for at least 12 hours.
- Wig maintenance: Comb the mask's wig with a metal brush, starting from the ends to the roots. Use conditioner diluted in water to remove knots. Checkpoint: The wig should be free of knots and have a natural shine, without an oily appearance.
The art of Acting Cosplay
Acting with a cosplay mask requires you to abandon human facial expression. The viewer will read your intentions through the angle of your head. To express sadness, tilt your head down and turn it slightly to the side. To demonstrate surprise, make a quick backward tilting movement.
Remember: less is more. Since the mask is static, sudden movements can look artificial. Practice in front of a mirror, focusing on keeping your head level with the horizon, except when communicating a specific emotion.
Mastering the Animegao Kigurumi is a process of patience and constant refinement. Keep your equipment clean, adjust the interior according to your event's needs, and above all, hold the pose to ensure that the magic of your kigurumi mask remains intact throughout the day.
Advanced Design Modification and Customization Techniques
To raise the level of a Kigurumi mask from an "off-the-shelf" piece to a personalized work of art, the focus should be on micro-customization. An advanced technique is the replacement of standard eyes with high-gloss UV resin lenses with optical depth. Use low-viscosity epoxy resin (such as Redelease) to create a "living look" effect. For attachment, use 1mm 3M VHB double-sided tape, which ensures impact resistance without damaging the mask's paint.
Another crucial modification is forced internal ventilation. Resin masks retain a lot of heat. Install two 30x30mm micro-fans (5V DC Brushless model) positioned at the temples, directed outwards. Power them with a 2000mAh pocket power bank, attached to the inside of the nape with adhesive velcro. To prevent fogging, apply a thin layer of anti-fog solution (such as Essilor Optifog) to the inside of the polycarbonate lenses. If you wish to alter the design without losing its essence, use a high-adhesion grey automotive primer before applying professional acrylic paints from the Vallejo Game Color line. This allows you to create character "skin" variations (such as Christmas or combat versions) using automotive masking tape (18mm width) to isolate paint areas with millimeter precision.
Technical Fault Diagnosis and Preventive Maintenance
The long-term success of a Kigurumi mask depends on the early diagnosis of structural failures. The most common technical error is the wear of the internal support foams. If the mask starts to "dance" on your face, replace standard density foams with high-density EVA (40kg/m³) that is 10mm thick, cut into a "T" shape to distribute the weight evenly on the forehead and chin.
Another critical point is the integrity of the finish. Surface scratches in the paint can be removed with fine automotive polishing compound (e.g., Lincoln Polishing Compound) applied with a microfiber cloth in light circular motions. If you notice cracks in the resin — usually caused by drops or excessive pressure when putting it on — do not try to glue it with common superglue. Use fiberglass with polyester resin inside the mask to reinforce the area, sanding the outside with 1200 grit wet sandpaper and reapplying the base sealer. Periodically, check the state of the synthetic hair fiber (Kanekalon). To avoid a "tangled" look, use a silicone hair spray or a mixture of fabric softener diluted in water (1:5 ratio) and comb with a metal-bristled brush, starting from the ends to avoid tensioning the base of the wig glued to the mask. Documenting these interventions in a maintenance log, recording the type of adhesive and the brand of paint used, will ensure you know exactly how to proceed with future repairs, keeping your piece impeccable for years.
Low-Cost Alternatives versus Professional Solutions
When balancing your budget, understand where to save and where to invest. Instead of importing expensive resin bases, using 3D-printed masks in PLA+ filament (with 15% infill) is a viable alternative, provided they are treated with progressive sanding (80, 220, 400, 600, and 1200 grits) and the application of filler primer (Dupli-Color spray). While the professional uses high-strength polyurethane resin, the beginner can obtain an almost identical aesthetic result with the correct finish. However, do not skimp on the wig attachment system: using common hot glue is a mistake that will melt the base of the mask on hot days. Invest in high-temperature contact adhesive or two-component epoxy adhesive (like Araldite). For the eyes, while professionals order custom acrylic lenses, you can use 25mm glass domes for crafts (cabochons), which offer a professional refraction effect for a fraction of the price, simply by printing your character's iris on high-grammage photo paper and gluing it to the back.
When wearing your Kigurumi mask, remember that you are not just wearing an accessory, but bringing to life an entity that transcends fabric and resin. Each technical adjustment and each customized detail serves to make your performance the perfect bridge between anime fantasy and the reality of the event. Embrace the immersion, maintain your character's posture, and let the magic you have built with such care enchant everyone around you.