Preparation and reference analysis
Before you cut the first piece of EVA, set aside at least three hours to study the Demogorgon from Stranger Things in motion. Netflix provides key scenes in 4K in episodes 1×08 and 2×01 – capture front, three-quarter, and profile frames. Note that the “jaws” are not just two: they are eight petals that open radially, with the inner edge covered in consecutive teeth. The maximum opening seen in the series forms an angle of approximately 110°; reproducing this value ensures the iconic instant “rip.” Compile everything in a folder with annotated measurements: base width of the petal (average 9 cm), length of the dental cylinder (3 cm), and distance between throat and red LED (6 cm). These notes will be your map when the latex is already curing and you can no longer pause to watch the series.
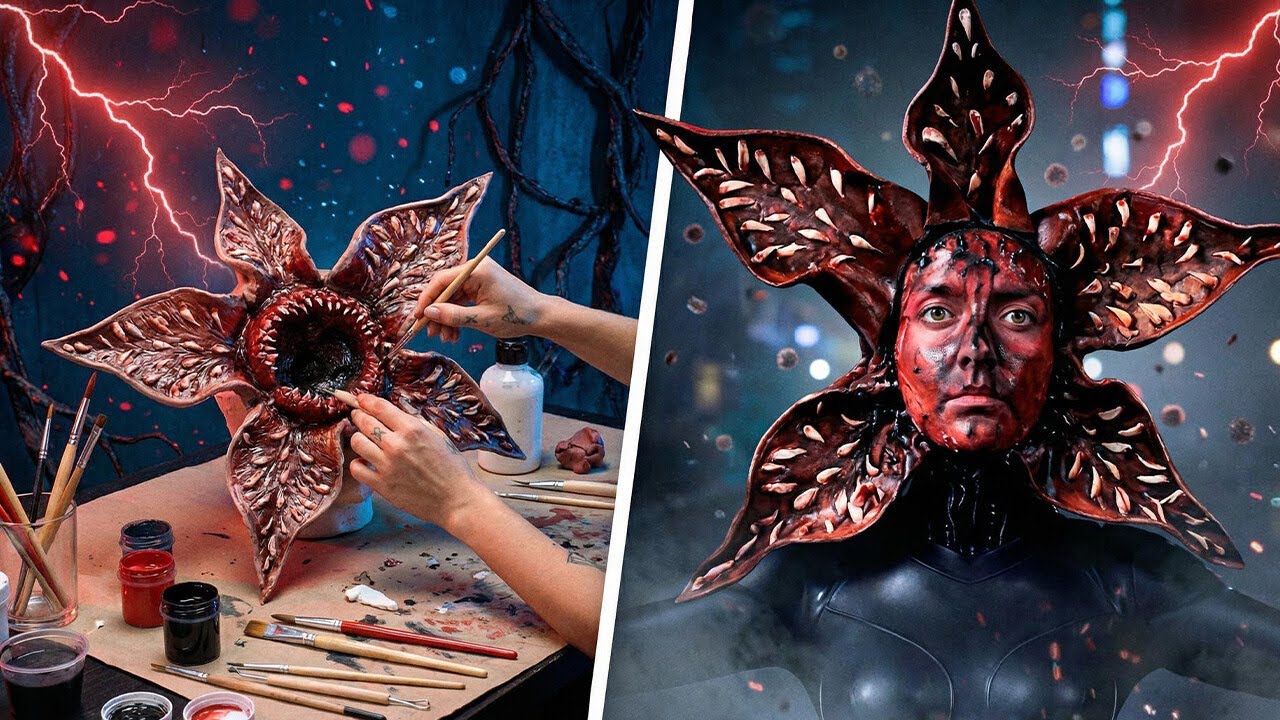
The choice between the 1st or 4th season version directly impacts working time: the classic version has translucent fur and purple veins, while the later “demo-bat” requires thicker latex membranes. For this Demogorgon tutorial, we will focus on the original version with petal opening and internal glow, as it is the one that appears most in cosplay panels. If this is your first time with cosplay special effects, limit yourself to eight petals; veterans can go up to twelve, but each new petal adds 40 g of weight and 2 h of seam sealing. Finally, decide now whether the helmet will be worn with or without vision glasses – the position of the upper petals changes 1.5 cm downward when there are glasses, preventing them from hitting the lens. Decide now, because changing later requires re-cutting.
Cranial base modeling
The base is a 2 mm thermoformed ABS helmet, or, if you don’t have access to a heat gun, 6 mm EVA rings glued in concentric layers. Start by measuring the head circumference 1 cm above the ear; this will be the inner diameter of the main “arch.” Cut 12 EVA wedges of 6 mm with 5 cm width at the base and 3 cm at the top. Glue with black fiber hot glue over a spherical form, creating an open skeleton – samurai armor style. The goal is to reduce weight: the set must stay below 450 g before electronic additions. Let it cure for 4 h; then test the fit: when shaking your head sharply, the skeleton must not slide forward nor leave a mark on the forehead.
The front opening where the petals lodge needs a 3 cm belt around the mouth; use 2 mm ABS heated to 120 °C for 8 seconds to bend precisely. Mark holes every 2 cm where 4 mm pins will enter: they will serve as an axle for the petals. Check: with the helmet on your head, open your mouth to the maximum – you should feel the “belt” follow the movement of the real jaw without tightening. If it tightens, enlarge by 0.5 cm; if it’s loose, reduce. This slack is vital, because the latex later will thicken everything.
Creation of articulated facial petals
Each petal is built in three layers: structure (4 mm EVA), intermediate 2 mm neoprene for cushioning, and outer cured latex coating. Trace the pattern on cardboard: 9 cm base, 15 cm height, and tip tapered at 30°. Multiply by eight; before cutting, confirm that the eight bases fit around the belt without overlap – 360° / 8 = 45° between centers. Common mistake: leaving 50°; this creates a gap that exposes the human face. Cut the EVA, bevel the edge with a Dremel at 30° so the petals “swallow” each other when closed.
The articulation uses a 40 kg servo motor attached to the belt and a 2 mm steel rod. Mount a T-bracket: the servo sits inside the belt, the 4 cm arm links to the petal “stem” via a resin eyelet. Test the cycle before finishing: program an Arduino sweep from 0° to 55° in 0.4 s. The petals must snap simultaneously with a dry sound; if there is spaced “tick-tick,” adjust the initial angle. Checkpoint: with all eight petals installed, the set must open from 0° to 110° in less than 1 s without visible oscillation. If it oscillates, reduce speed or increase the counter-arm weight with fishing lead.
Latex layer and organic texture
Coat the petals with a mixture of liquid latex and flexible acrylic paint in a 4:1 ratio. Apply with a makeup sponge in circular motions, from outside to inside, to mimic pores. Each coat must be between 0.3 mm and 0.5 mm; thicker cracks, thinner doesn’t cover. Do four coats, drying with a hair dryer on cool between them. For the veins, use latex with black pigment and a piping tip – make quick spirals, then “break” with a dry brush to keep a diffused edge. The final texture should look like toad skin, not smooth plastic.
Application on the helmet follows the same logic, but add a fine mesh fabric between two coats for strength. This prevents the latex from tearing when you open your mouth. Checkpoint: bend a petal 90°; the film must not show white cracks. If it does, add 5% thinner to flexibilize. Curiosity: latex cures 70% in 24 h, but takes 72 h to release ammonia – air it away from metals; otherwise, the “rotten egg” smell will bother you at the event.
Internal lighting system
Use NeoPixel strip 60 LED/m cut into six 5-LED segments. Position them on the inner “lining” of the belt, facing upwards, so the light spills along the sides of the petals. Program the Arduino for a fade from red #FF0A00 to #FF5C00 in 1.2 s synchronized with the opening. Power comes from a Li-ion pack 12 V 5 Ah; with 30 LEDs, the autonomy is 4 h continuous – enough for contest and night parade.
For diffusion without “hot spots”, stick matte aluminum tape (side matte) behind the LEDs; it reflects light evenly. Test in a dark room: when the petals open you should see a subtle glow, not the bare LED. If spots still show, place a ring of frosted acetate 1 cm away from the LEDs. Checkpoint: with the head closed, no light leak should be visible at 2 m; if there is, increase petal overlap or add felt to the edge.
Audio and sound effects
Record three samples: heavy breathing (0.8 s), opening snarl (1.2 s) and closing “snap” (0.3 s). Use Audacity to EQ: cut highs above 6 kHz and boost 80–120 Hz for weight. Store them on a DFPlayer Mini module wired to the same Arduino as the servos; this lets you trigger light and sound with a single command. Output goes through a 5 W mini-amp whose enclosure is a PLA-printed throat-shaped box—resonance enhances the lows.
Control: a capacitive touch button inside the helmet cheek. Two quick taps fire the opening sequence; a long press cancels. Checkpoint: with the amp at 70 % volume, sound must be clear at 3 m but not clip the speaker. If there is hiss, swap the audio cable for a shielded one and keep a single GND loop. Golden tip: test in an empty mall; the echo reveals distortion you won’t notice at home.
Final assembly and wear test
Secure every part with 50 mm industrial Velcro for future maintenance. Wrap joints with Teflon tape to stop friction noise. Wear the full helmet for 30 min while watching an episode; note pressure points. Usually the back of the head needs 8 mm foam padding. Next, run a quick wear test: open and close the petals 100 times in a row. Check: no screw should loosen, LEDs must keep 90 % brightness, and the servo must stay below 40 °C (use an IR thermometer). If it exceeds, add a 20×20 mm heatsink.
Before closing everything, shoot a short video showing opening, light and sound. Send it to a friend who doesn’t know the project—they get 3 s to recognise “Demogorgon”. If they don’t, tweak lighting, petal angle or sound. Ensuring the effect is iconic beats 10 h of tiny details.
Estimated Budget
| Item | Price range | Source |
| --- | --- | --- |
| EVA 6 mm 50x100 cm | $2.40 - $3.60 | Estimated FX |
| Látex líquido 1 kg | $16.00 - $24.00 | Estimated FX |
| Servo motor high-torque 40 kg | $17.00 - $22.00 | Estimated FX |
| Kit Arduino Nano + NeoPixel 1 m | $11.00 - $15.00 | Estimated FX |
| Mini-amplificador 5 W | $5.00 - $7.00 | Estimated FX |
| Tinta acrílica flexível 60 ml | $4.40 - $6.00 | Estimated FX |
| Bateria Li-ion 12 V 5 Ah | $18.00 - $26.00 | Estimated FX |
| ABS 2 mm para base | $7.00 - $10.00 | Estimated FX |
Estimated conversion based on a reference FX rate; local retail prices may differ.
Common mistakes and how to fix them
-
Servo “jamming” after 30 cycles
Cause: 5 V / 2 A supply insufficient.
Fix: use 5 V / 5 A supply or feed servo straight from the 12 V battery via a 5 V / 8 A UBEC. Re-wire with 22 AWG. -
Latex cracking on petal fold
Cause: layer >0.6 mm or too much pigment.
Fix: lightly sand the crack, wipe with isopropyl, add 10 % latex thinner and re-apply thin coat. Flex several times before full cure. -
LED strip “going dark” on one side
Cause: voltage drop from series wiring.
Fix: power sections in parallel with 0.5 mm copper wire and “inject” 5 V every 30 LEDs. Multimeter test: drop must stay under 0.3 V. -
Shrilly noise from speaker
Cause: shared GND with servo.
Fix: route audio GND straight to the battery, bypassing the Arduino. Add 100 µF ceramic cap between 5 V and GND on DFPlayer.
If a problem pops up that’s not listed, remember: 90 % of cosplay FX failures are power or grounding. Check those two first before scrapping parts.
You now have a complete Demogorgon tutorial, from skull base to opening sound. With 6–8 weekends of work you’ll take to the con a non-human figure that opens its head, glows and snarls—just like the Stranger Things cosplay. Happy scaring!